Accessing the RetroPie PlayStation Emulator’s High Resolution Mode
This post builds upon the information in the preceding article PlayStation Emulation on the Pi: Enhancing the Experience with the Options Menu – Part One: Basic Features and Save States , and the introductory piece entitled RetroPie Emulation: RetroArch, Libretro, and the Power of the Options Menu.
Many of the entries on the RetroArch/Libretro main menu screen lead to sub menus, most of which contain numerous entries, and further sub menus. Discussed here are a couple of entries within the Core Options sub menu of especial interest to PlayStation emulation.
Core Options – Enhancing the Graphics Resolution
It is possible to force RetroPie’s PCSX-ReARMed PlayStation emulator to render graphics in a resolution considerably higher than the native modes available on the genuine console’s hardware. I should note that whilst this can make stunning visual improvements to many games on the system, unfortunately the Raspberry Pi 2 lacks enough CPU power to reliably run all games at full speed.
Rendering the output in enhanced resolution incurs significant processing overhead. The emulator in its current form is only able to utilise one of the four CPU cores present on the Pi; perhaps a future (radical) enhancement to PCSX-ReARMed will unlock the full potential of the system.
All is not lost, however, and gaining additional processing power by running the Pi with maximum stable overclocking is definitely recommend – see my earlier posts on this topic for information on enabling and testing overclocking: Overclocking and Stability Testing the Raspberry Pi 2 – Part 1: Overclocking in Depth
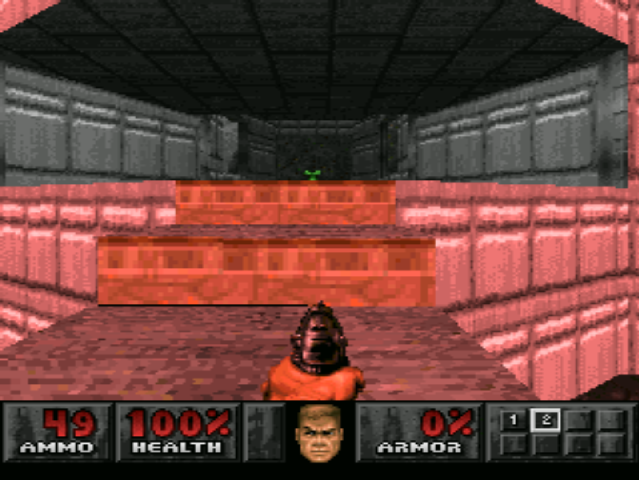
With overclocking applied many titles are able to run at close to full speed, or exhibit tolerable slowdown only in very demanding sections of games; in these cases often the audio suffers slight slowdown or corruption, whilst the visual fidelity is maintained. Unfortunately some titles become unplayable due to the reduced framerate, whilst others, such as Doom, exhibit graphical corruptions rendering the enhanced resolution mode useless.
Enabling Enhanced Resolution
To experiment with the high resolution graphics mode, from the main RetroArch/Libretro menu, select Options, then from the Options sub-menu, select Core Options
To output enhanced resolution graphics, enable the following option:
Enhanced resolution (slow)
This increases the resolution of the 3D polygons, producing a far sharper image, however all 2D bitmaps and texture maps retain the original resolution. The obtrusive dithering effect employed in many PlayStation titles is far less evident as the dither grid overlay is rendered in much higher resolution.
Besides utilising overclocking, as mentioned previously, it is worth enabling the following option when using the enhanced resolution mode:
Enhanced resolution speed hacks
This option appears to be generally required when using the Enhanced resolution (slow) mode, although this may introduce instabilities (anecdotal, from my own experience only). I’ve not found any definitive information regarding the scope and functionality of the speed hacks – indeed it is not clear if they even affect the Raspberry Pi port of the emulator. In general, I switch the speed hacks on, and only turn them off if the emulator crashes or exhibits other glitches to see if stability improves.

Smoothing the Video Output with Bilinear Filtering
The in-game screen grabs included in this post all feature a degree of smoothing, which is applied by via Libretro to the emulator in the form of bilinear filtering. I choose to apply this mainly to combat the extremely apparent dithering effect which a great many PlayStation games utilise.
The dithering effect works well on the original PlayStation hardware, when connected to a cathode ray tube (CRT) television via RF or composite cables; in this case inherent limitations in the technology are exploited to cause a natural anti-aliasing effect to blend the dithering, creating the illusion of more, and smoother, colours. Unfortunately on modern LCD displays the effect becomes revealed for what it truly is – a rather obvious pixelated grid.
Whilst switching the bilinear filtering on or off would seem an obvious feature to be made available via the RetroArch/Libretro menu, I have not located an entry which does so. Instead I added an entry (video_smooth = true) to the PlayStation emulator’s configuration file to achieve this:
Locate and edit the retroarch configuration file for the PlayStation emulator:
Cd /opt/retropie/configs/psx

Sudo nano retroarch.cfg
Add the entry to enable video smoothing:
# All settings made here will override the global settings for the current core

rewind_enable = false

# added next line

video_smooth = true
Save the changes – this applies bilinear filtering to every game played on the PlayStation emulator from now on.
For basic guides on accessing and editing their configuration files which underpin RetroPie’s components, and help on using the Raspbian Linux operating system on which everything runs, please see my earlier posts:
- Don’t Fear The Command Line: Raspbian Linux Shell Commands and Tools – Part 1
- Navigating the Raspberry Pi’s File System. Raspbian Linux Shell Commands and Tools – Part 2
Part Three of these posts investigates using the Libretro menu to enable analogue controllers, and some subtle issues related to this.
A Labour of Love
Retro Resolution is entirely a labour of love. Please consider offering a donation if the information here has helped illuminate, enlighten, or otherwise assisted you!

Related Posts
- RetroPie Emulation: RetroArch, Libretro, and the Power of the Options Menu
- PlayStation Emulation on the Pi: Enhancing the Experience with the Options Menu – Part One: Basic Features and Save States
- PlayStation Emulation on the Pi: Enhancing the Experience with the Options Menu – Part Three: Analogue Controllers
- What is RetroPie? System overview, software and hardware
- Links: Raspberry Pi and Gaming Emulation via RetroPie
About
Disclaimers
Privacy Policy
Terms and Conditions
© Retro Resolution


Thanks a lot for this explanation ! this is amazing !
LikeLike
Thank you for your comment – much obliged; I’m glad that people are still finding the guides useful, and seeing how amazing the PlayStation games can look on the humble Raspberry Pi
LikeLike
thank you really appreciate this tutorial! love you for this dude
LikeLike
Glad it was of use – enhanced resolution is a great feature, and one not present on the PlayStation emulator included PC version of RetroPie
LikeLike