Have Your Pi and Eat It!
In this post I’ll be documenting how I set up a Raspberry Pi 3 (you can also use a Pi 2) as a lightweight PC replacement, combining a fully-fledged desktop GUI (Raspbian), Media Center (Kodi), and video games console and computer emulation suite (RetroPie).
The Pi 3 actually makes for a very capable PC replacement; this, and recent, posts, including graphics work, have been undertaken solely on the machine.
Topics Covered in this Post
- A Little Background
- Considering the Options
- Undertaking the Installation: A Step by Step guide
- Obtaining and Installing Raspbian
- Configuring the Raspberry Pi
- Installing RetroPie
- Installing Kodi Media Center
- Building on the Foundations
A Little Background
I have a couple of older Raspberry Pi machines, each of which is limited to a single task. The Model 1 Pi has been doing duty for a couple of years as a media center, and is dedicated to running XBMC (named for XBox Media Center, showing the roots of the project which is now known as Kodi).
The Pi 2 is currently used for retro video gaming, running an installation of RetroPie 2; I ill-advisedly used the retropie_setup.sh script option to delete Raspbian files that were not directly needed by RetroPie, thereby removing the option of using the machine as a desktop replacement.
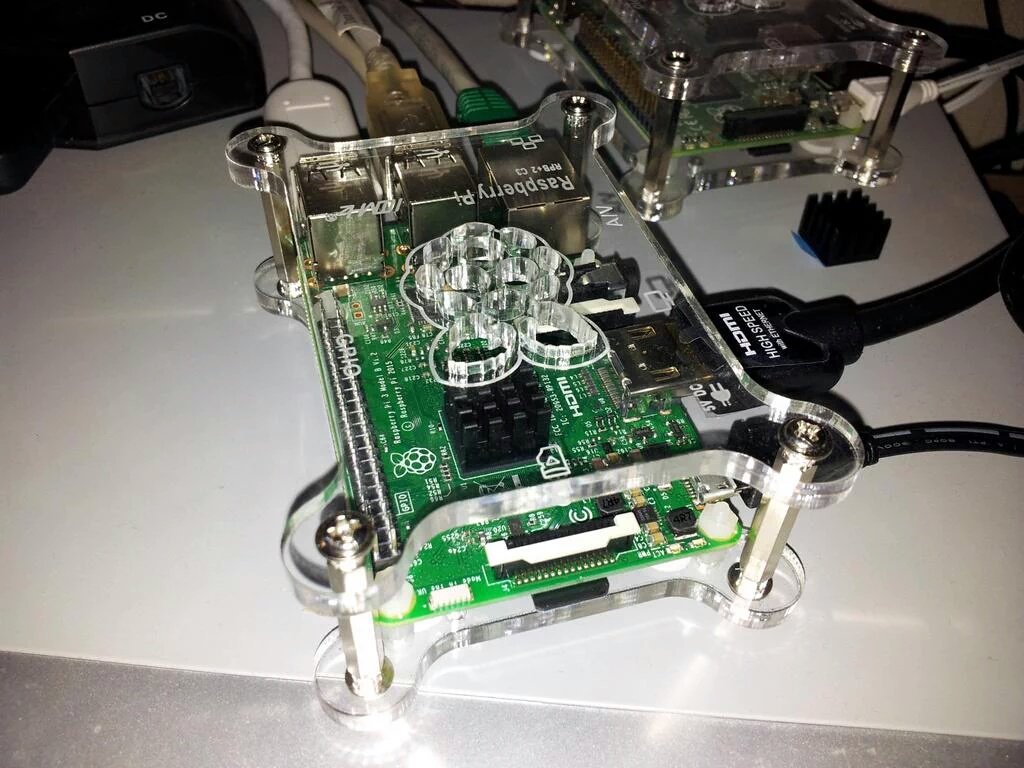
Having taken delivery of a shiny new Raspberry Pi 3 I was keen to take advantage of the increased power of the machine, along with a sizable 64GB SD Card, using it to perform multiple duties: a media center, a retro-gaming system, and PC workstation. I also wanted to avoid the need for swapping SD Cards, which is both a hassle and introduces needless wear and tear on the card port.
Considering the Options
One option for creating a Raspberry Pi installation capable of undertaking several roles is to use Noobs, which provides a boot loader allowing the selection and automatic installation of a range of different operating systems (including ones hosting Raspbian desktop and OSMC Media Center). At run-time the user can select which OS to run.
Whilst Noobs is a very handy, user-friendly approach it does have some limitations. Each selected package requires a full operating system, which consumes storage space; each OS is totally segregated; there is no control over the size of partition dedicated to each OS (the card is simply divided equally); once selected, it is not possible to add or remove the selected operating systems (at least, not via Noobs itself).
For my requirements, Noobs was unfortunately not viable; one issue was that OSMC (basically Kodi, underpinned by Raspbian) hadn’t yet been updated to work with the Pi 3; to be fair I was installing this the day the machine was released. Noobs also does not offer RetroPie as an installation option, although this emulator suite can be installed directly onto Raspbian (which is the route I chose to take).
I looked at an alternative multi-boot loader called Berryboot; unfortunately, whilst powerful, this had several similar limitations to Noobs, including a limited selection of operating system/packages to install, and no control over the individual partition sizes. Whilst it is possible to repackage installers (such as the image available from PetRockBlog for RetroPie), this really wasn’t the solution I wanted.
The breakthrough came after discovering that I could install RetroPie using the Raspbian‘s Advanced Package Tool (APT) system, and that Kodi could also be installed within an existing Raspbian system. In fact life was made even easier, as RetroPie itself offers a way to install Kodi into the operating system, and integrate it as an option in Emulation Station, the graphical front-end used by RetroPie.
A brief aside: When running emulators, such as those provided by RetroPie, the more power your machine can muster the better the performance will be. Please see the following posts for details on how to overclock the Raspberry Pi to obtain additional speed, for free:
- Part 1: Overclocking the Raspberry Pi
- Part 2: Stress testing the CPU with mprime
- Part 3: Stress testing the RAM with Memtester
- Part 4: Stress testing the SD card storage with the Stability Test Script
- Overclocking the Raspberry Pi 3: Thermal Limits and Optimising for Single vs Multicore Performance
Undertaking the Installation: Step by Step
Please note: once Raspbian has been installed, nearly everything else is added using the Advanced Package Tool (APT). Prior to installing software packages using APT, ensure the repositories are up-to-date, by issuing the following command:
sudo apt-get update
For details on using the APT, please see my post: Don’t Fear The Command Line: Raspbian Linux Shell Commands and Tools – Part 1
Obtaining and Installing Raspbian
Raspbian is the core of the Raspberry Pi system – it comprises the Linux Operating System, the Command Shell, and the X-Windows GUI Desktop environment. All of the other components build on top of Raspbian, and hence it must be installed first.

- Download Raspbian (full, not Lite) from RaspberryPi.Org. At time of writing the current version is Raspbian Jesse. Please note that this is the standalone installer for Raspbian, not the Noobs package.
- Instructions for this step can be found in the Installation guide from the site.
- Post Installation – Update and Upgrade
After installing the Raspbian image the system should be connected to the internet, and a couple of commands run to ensure that the operating system is completely up to date. The commands also update all installed software packages, and the repository information used when installing packages in the future.- First, start a Terminal (a.k.a Command Line or Shell). From the Menu, select Accessories, then Terminal
-
Type:
sudo apt-get update
sudo apt-get upgrade
Once the process has completed, close the Terminal

Raspbian Update via Terminal

Configure The Raspberry Pi
The Raspberry Pi is highly configurable; initially we need to adjust a handful of settings, although many others can be changed at a later stage (for example should you choose to apply overclocking to eke more speed from the machine).
Set Boot Options
Older releases of the Raspbian OS booted directly into the text-mode Command Line / Shell; more recent versions start the desktop GUI by default. Although booting direct to the Raspbian desktop GUI is handy, selecting this option also removes the ‘Exit to Command Line’ option from the Shutdown menu; this is a problem as Emulation Station / RetroPie cannot be launched from within the GUI environment.
For ease of use on a multipurpose system firstly we configure the machine to boot directly to the command line. This can be done from either the raspi-config tool (from the command line or the a command shell on the desktop), or the graphical Raspberry Pi Configuration tool on the desktop.
To use the Raspberry Pi Configuration tool to set boot options using the graphical user interface tool on the desktop:
-
From the Desktop’s Menu, Select Preferences, then Raspberry Pi Configuration

Raspbian Desktop – Raspberry Pi Configuration Tool - On the System tab, set the Boot option as To CLI
- Depending on your security preferences, you can set the Pi to log in automatically by selecting the Auto Login option; this is also located on the System tab.

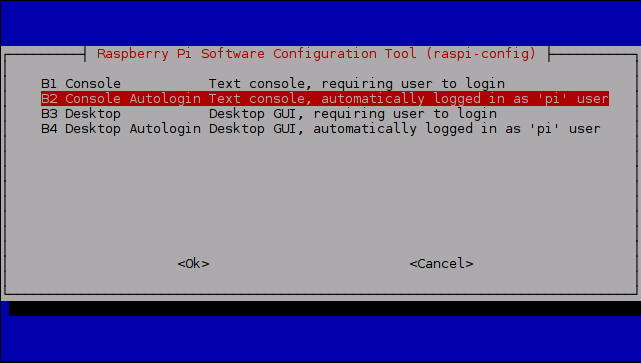
To use the raspi-config tool to set boot options, run the configuration tool either from the text-mode command line, or from a Terminal window launched on the desktop (Menu, Accessories, Terminal)
-
At the command line type:
sudo raspi-config

- Select one of the two options to boot to Console (select autologin if you’re not overly concerned with security of your Pi)

Setting Overscan
Overscan is a holdover from the days of CRT monitors; due to limitations in the technology used to produce the image on screen, it was not possible to guarantee the exact amount of usable space on any given monitor (or television). To compensate, an unused border area surrounding the display was defined.
The Raspberry Pi has an overscan setting, with definable widths for the borders; when using modern pixel-mapped displays (LCD / Plasma / OLED) the overscan setting should be switched off to prevent unnecessary wastage of screen real-estate.
- Using the Raspberry Pi Configuration Tool, on the System tab, set the Overscan option to Disabled.
- Alternatively use the raspi-config tool, select Advanced Options, then select the Overscan sub-menu and choose Disable.
Setting Localisation
There are various Localisation values which should be set, especially if you are planning to make use of the various RetroPie emulators:
Locale (Language, Country, and Character Set), Timezone (Area and Location), Keyboard (Country and Variant), and Wifi Country.
- Using the Raspberry Pi Configuration Tool, on the Localisation tab, set the Locale, Timezone, Keyboard, and Wifi Country as required.
- Alternatively use the raspi-config tool, select Advanced Options, then select the Internationalisation Options sub-menu, and set the Localisation options from the nested sub-menus.
Setting the CPU/GPU Memory Split
The Raspberry Pi contains memory which is shared between the main CPU and the graphics processor (GPU). The amount of ram assigned to each component can be set via the Memory Split.
Whilst there is an option for this within the Raspberry Pi Configuration Tool, I have found that the entry which it places in the /boot/config.txt file is effectively ignored. This appears to be due to the fact that there are now multiple variants of the Raspberry Pi, with either 256MB, 512MB, or 1GB ram; there are corresponding configuration entries for these different systems, but they are not set via the tool.
To set the memory split, I prefer to directly edit the /boot/config.txt file, using the Nano text editor.
- Launch an instance of the Terminal, and open the config.txt file in the Nano.
Note: it is necessary to run Nano as a super user, via thesudocommand, to allow changes to be saved. Type:
sudo nano /boot/config.txt -
Locate the block of entries controlling the GPU Memory Split at the end of the file
N.b. these entries may not already be present; if they are not, simply add the values to the config file.
gpu_mem_256=128

gpu_mem_512=256

gpu_mem_1024=256 -
On a 1GB system (Pi 2 or 3), set the memory split to allocate 128MB to the GPU; it can be handy, but is not necessary, to comment out the original line (‘#’).
#gpu_mem_1024=256

gpu_mem_1024=128

gpu_mem=128 -
Note: The
gpu_mem=128value is added if you use the tools to set the memory split; I’m leaving the entry in the file as a ‘belt and braces’ measure. - Use
Control + ‘X’to leave the editor; this will prompt a warning regarding saving changes – pressYto commit updates to the filesystem
Expand the Filesystem
Update – June 2016: It may no longer be necessary to manually run the Expand Filesystem tool. During testing using the Raspbian Jessie image dated 27/5/2016, the system automatically expanded the root filesystem during the setup phase upon first boot
The Raspbian operating system image which was installed at the start of this guide is generally smaller than the Micro SD memory card onto which it is placed. To access the rest of the storage, use the Expand Filesystem tool. This is available from both raspi-config and the Raspberry Pi Configuration Tool.
- If using the Raspberry Pi Configuration Tool, on the System tab, click the Expand Filesystem button.
- If using raspi-config, select the first entry on the first menu Expand Filesystem.
Following the above steps, reboot the Raspberry Pi for the changes to take effect. After rebooting, the Pi should bring you to the text-mode console.
If you wish to access the desktop at any time, type: startx.
To return to the console, use the Menu, select Shutdown, then Exit to Command Line
Installing RetroPie
Installation of RetroPie on an already extant Raspbian system is relatively straightforward. First, after completing the steps listed, ensure that the Raspberry Pi has been rebooted.

Obtaining and Installing RetroPie
-
At the console, install support for accessing GitHub code repositories by typing the following command:
sudo apt-get install -y git dialog -
set the working directory by typing:
cd -
Download the RetroPie setup script by issuing the following command:
git clone --depth=1 https://github.com/RetroPie/RetroPie-Setup.git -
Change the working directory to the newly downloaded
RetroPie-Setupdirectory:
cd RetroPie-Setup -
Allow the setup script to be executed (run) by changing a file attribute:
chmod +x retropie_setup.sh
Running the RetroPie Setup Tool
- To launch the RetroPie setup script, type:
sudo ./retropie_setup.shAs RetroPie is continually under development, the setup system is subject to change. Prior to the development release on 7th June 2016, running the setup script presented a screen similar to the following:

RetroPie Setup Tool - If this is the case with your system, select the Binary-based installation (recommended) option, which will begin downloading and installing the components which comprise RetroPie.
-
If your menu appears similar to the image, below, please take a look at my expanded installation guide:
RetroPie Manual Installation Guide, including the Version 4 Setup Script Revised Menu Structure -
Once the installation completes, reboot the Raspberry Pi. Generally it’s never a good idea to simply switch the power off as the filesystem can become corrupted. To reboot cleanly from the command line:
sudo reboot
If you wish to shut down the Pi from the command line:
sudo shutdown -h now -
When the Pi has rebooted, to launch RetroPie, issue the following command:
emulationstation
(this is the name of the graphical user interface used by RetroPie)


On a fast internet connection, with a Raspberry Pi 3, this generally takes about 20 minutes in my experience. Your mileage may vary…
During installation the in-built power-saving feature may blank your monitor – press any key to restore the display (I tend to use shift as it’s less likely to interfere with anything).
A comprehensive first-time usage guide for RetroPie can be found here.
Installing Kodi Media Center
Installation of Kodi Media Center on an existing RetroPie system is made simple by the RetroPie Setup tool.
Installing Kodi via the RetroPie Setup Tool
- Run the RetroPie Setup Tool as detailed in the previous section.
- Select Option 4: Experimental Packages (these are potentially unstable)
-
From the sub-menu, select the entry Kodi – Kodi open source home theatre software

RetroPie Setup Tool – Experimental Packages Sub Menu
As noted previously, the menu system changed radically in June 2016. If the menu which appears is the older format:

If the menu is in the newer format, Kodi is installed from the Optional Packages sub-menu. Please see my expanded installation guide for details: RetroPie Manual Installation Guide, including the Version 4 Setup Script Revised Menu Structure
Launching Kodi
-
From within Emulation Station (the RetroPie GUI), Kodi can be launched from the Ports sub menu.
N.B. A previous build of RetroPie provided Kodi with a standalone sub menu, however at time of writing this has been removed for technical reasons.
When launched from within Emulation Station, Kodi benefits from RetroPie‘s automatic support for external USB storage devices -
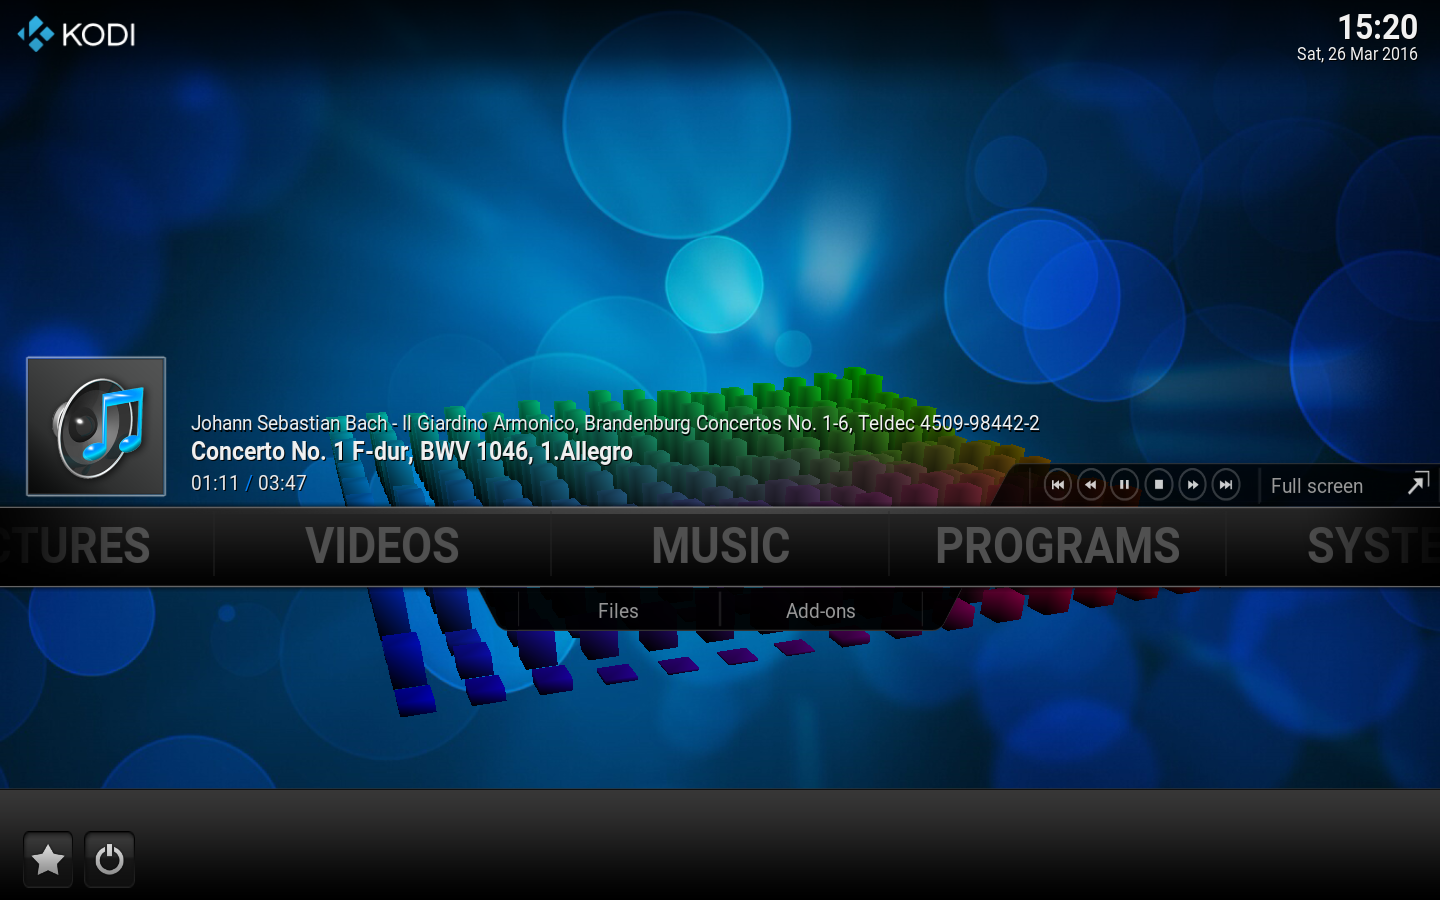
From the Raspbian Console, launch Kodi by typing:
kodi
When run from the console (outside of the Raspbian Desktop) there is no native support for externally attached USB storage, although it is possible to install packages, or manually add entries to thefstabfile, to provide this. - From the Raspbian Desktop, launch Kodi from the Menu. Select the main Menu, then select the Sound & Video sub menu, then the Kodi entry.
Handling Possible SSL Errors When Installing Kodi Add-ons
In a post on the retropie.org.uk forum user wetriner notes:
…there’s some SSL verification problems when you try and run some addons through the stock RetroPie image. It’s a pretty quick fix though.
sudo apt-get install --reinstall ca-certificates

sudo update-ca-certificates --fresh
I personally did not experience any SSL issues when installing the Twitch TV and BBC iPlayer add-ons, however Kodi may have been launched via the Terminal or Raspbian desktop at the time.
Exiting Kodi
Kodi provides a power menu, with options to Shutdown, Reboot, or Exit. When using the Exit option, control is returned to wherever Kodi was launched from, however sometimes this leaves the user facing a blank screen. There is a workaround for this issue:
-
Press
Control + Alt + F2, thenControl + Alt + F1. This switches between the 2nd and 1st of Raspbian‘s virtual consoles, which restores the display.
Building on the Foundations
In the continuation of this post, Multipurpose Raspberry Pi – Part 2: Adding a Menu to Access RetroPie, Kodi, and the Raspbian Desktop, I cover in detail the process of adding a menu to allow selection between the application suites installed in this guide.
The menu automatically loads after the Pi boots to the Bash shell, and is re-displayed whenever the user exits one of the suites, using either Kodi‘s Power button, Emulation Station‘s Quit submenu, or Raspbian desktop’s Shutdown option. The menu has been designed to prevent automatic loading within terminal windows launched under Raspbian, or SSH session consoles.

In a future post I aim to cover various useful tools, configuration and setup changes, and software packages, covering a range of items including: providing a Bluetooth manager GUI package, installing the FireFox web browser, accessing TwitchTV streams from the desktop and from Kodi, changing the console font style and size, and setting a static IP address for ethernet and wireless adaptors.
A Labour of Love
Retro Resolution is entirely a labour of love. Please consider offering a donation if the information here has helped illuminate, enlighten, or otherwise assisted you!

Related Posts
- Links: Raspberry Pi and Gaming Emulation via RetroPie
- Multipurpose Raspberry Pi – Part 2: Adding a Menu to Access RetroPie, Kodi, and the Raspbian Desktop
- Don’t Fear The Command Line: Raspbian Linux Shell Commands and Tools – Part 1: Just the Basics
- Navigating the Raspberry Pi’s File System. Raspbian Linux Shell Commands and Tools – Part 2
Overclocking and Stability Testing the Raspberry Pi
- Part 1: Overclocking
- Part 2: Stress testing the CPU with mprime
- Part 3: Stress testing the RAM with Memtester
- Part 4: Stress testing the SD card storage with the Stability Test Script
- Overclocking the Raspberry Pi 3: Thermal Limits and Optimising for Single vs Multicore Performance
About
Disclaimers
Privacy Policy
Terms and Conditions
© Retro Resolution

Thanks for the great info, though I still prefer the berryboot solution that supports cec control starting from boot and it’s easier to remove, add, backup and everything. Ps. There are a few inconsistencies regarding the memory of the various pi’s where Kb should be Mb and such. 😉
LikeLike
Thanks for your feedback! I think Berryboot is a great tool, it just wasn’t quite what I needed for this specific project.
I’m not sure how I messed up those memory sizes – I’ll blame using the Atari ST emulator, Hatari, whilst writing the guide – a machine where 1MB was considered a large amount of RAM!
I’ve corrected the article, ta.
LikeLike
I just want to say I really appreciate this guide you’ve created and the amount of effort you put into it. I was having headaches trying to setup Berryboot to dual-boot between RetroPie and OctoPi, and was having no luck due to weird partition expansion issues. Couldn’t access my SD card via browser from OctoPrint, etc.
Anyway, this guide really helped get me to a point where I can boot into a menu that allows me to select between RetroPie, Kodi, and the GUI, which then allows me to startup OctoPrint as well. I’m currently going through the motions of setting that up, and I’m trying to experiment with adding it to your startup script but I’m not sure what command to list in order to start OctoPrint. I’m sure it has something to do with creating a variable the way you did for emulationstation, or figuring out what variable it is like startx being a sys default. This guide rocks, and so do you, thanks for putting it together.
LikeLike
Thank you, that’s very encouraging. I hope you’re able to set your system up to launch OctoPrint. I regret that circumstances have severely limited the amount of time I have available to create new content at present.
LikeLike
Hi,
I am new to the PI and found your article amazing! After one failed installed with both raspbian and retropie I started again following your guide.
I am not familiar with the scripting language but would it be possible to add a timer to the loop? So for example after 20 seconds of no activity option X is selected. I know your tight for time but if its possible could you point me in the right direction and I can do some digging
LikeLike
Hi, many thanks for your positive feedback.
I spent a while thus evening trying different approaches for a time-out auto selection; none work satisfactorily with the existing blocking-input approach to reading the user’s input.
I’ll try and find some time to continue investigating, not least because this has been on my to-do list ever since the original post (indeed my version of selector.sh has commented out code from early attempts to implement this feature).
LikeLike
Hi,
Here’s a revised version of the menu selector.sh script, which provides a workable, if somewhat rough and ready, solution which includes a timeout which will launch an arbitrary command (in this case loading the desktop via ‘startx’ after 60 seconds).
#!/bin/bash # Set number of seconds to elapse before a default command is executed TIMEOUTSECONDS=60 show_menu(){ NORMAL=`echo "\033[m"` MENU=`echo "\033[36m"` #Blue NUMBER=`echo "\033[33m"` #yellow FGRED=`echo "\033[41m"` RED_TEXT=`echo "\033[31m"` ENTER_LINE=`echo "\033[33m"` echo -e "${MENU}*********************************************${NORMAL}" echo -e "${MENU}**${NUMBER} 1)${MENU} StartX (Desktop) ${NORMAL}" echo -e "${MENU}**${NUMBER} 2)${MENU} Emulation Station (RetroPie) ${NORMAL}" echo -e "${MENU}**${NUMBER} 3)${MENU} Kodi ${NORMAL}" echo -e "${MENU}**${NUMBER} 4)${MENU} *Reboot* ${NORMAL}" echo -e "${MENU}**${NUMBER} 5)${MENU} *SHUTDOWN* ${NORMAL}" echo -e "${MENU}*********************************************${NORMAL}" echo -e "${ENTER_LINE}Please enter a menu option and enter or ${RED_TEXT}enter to exit. ${NORMAL}" echo -e "${ENTER_LINE}Default: Launch StartX after ${MENU}$TIMEOUTSECONDS seconds${NORMAL}" #read from standard input; timeout occurs after $TIMEOUTSECONDS seconds read -t $TIMEOUTSECONDS opt } function option_picked() { COLOR='\033[01;31m' # bold red RESET='\033[00;00m' # normal white MESSAGE=${@:-"${RESET}Error: No message passed"} echo -e "${COLOR}${MESSAGE}${RESET}" } clear show_menu # check for exit code as a result of 'read' timeout if [[ $? -ne 0 ]] then echo -e "${MENU}Menu input - timeout triggered${NORMAL}" echo -e "${MENU}Launching X-Windows in 5 seconds ${NORMAL}" sleep 5 # run desired default; match relevant command from the CASE statement, below startx # re-load this script so the menu will be present after exiting from X-Windows back to the Terminal /home/pi/tools/selector.sh fi if [[ $opt = "" ]]; then exit; else case $opt in 1) clear; option_picked "Launching X-Windows"; startx # the main Terminal remains running whilst X-Windows loads on another process # re-load this script so the menu will be present after exiting from X-Windows back to the Terminal /home/pi/tools/selector.sh exit; ;; 2) clear; option_picked "Launching Emulation Station (RetroPie)"; emulationstation; /home/pi/tools/selector.sh exit; ;; 3) clear; option_picked "Launching Kodi Media Center"; kodi; /home/pi/tools/selector.sh exit; ;; 4) clear; option_picked "Rebooting System"; sudo reboot; ;; 5) clear; option_picked "Shutting Down System"; sudo shutdown -h now; ;; *) clear; option_picked "Pick an option from the menu"; show_menu; ;; esac fiLikeLike
Hello
Great guide having trouble at the beginning of installing retropie – I don’t understand where to type th ‘cd’ command I’m typing it and pressing enter on terminal and nothing is happening am I doing something wrong? cheers
LikeLike
Realised I only I putted half the info here !!
I’m trying launch the retropie setup and it’s saying – no file or directly exists? I’m wondering what I’ve done wrong!!! Pulling my hair out haha
LikeLike
Hi,
It could be any number of things. Can you type exactly what you’re seeing on the screen, including spaces? Without knowing what you’ve downloaded, what you’ve installed, and which directory you’re in it’s going to be tricky to advise.
Thanks
LikeLike
Perfect thank you very much for this
LikeLike
You’re very welcome; thanks for the comment.
LikeLike
Hi There,
Great content. I first Installed Raspbian and then Retropie through the terminal.
After the successful installation I rebooted and the splash screen for retropie appeared (I configured to boot to command line by default) And then I jumped to command line. When I executed ’emulationstation’ it said theres no such command.
How do I start retropie? What I did wrong?
Thanks
LikeLike
I was wondered if there was a way to enable a virtual keyboard or someway to use the game controller to select or execute actions, including controlling KODI. So far what I have tried can get me into Kodi or the desktop but the controller won’t function like a mouse or launch a virtual keyboard. Anyone know how to do this as that would be great to avoid needing a keyboard for my 4 year old who just wants to watch movies.
LikeLike
Thanks for the guides! It would seem the guide no longer works with the new version rasberrian stretch as of yet. Looks like retropie is not compatible 😦
LikeLike
Sorry to hear that. I’m afraid to say that hat currently I’m not in a position to assist or investigate in any way – believe me if I could help I would gladly do so.
If anybody reading this resolves the compatibility issue, please leave some guidance in the comment thread.
LikeLike
Great and handy article although i also installed new stretch only to find retropie not yet supported. Back to square one and jessie we go!
LikeLike
My question here is… i have a bluetooth keyboard when i get into the menu i got certain time to input a number the thing is.. my keyboard is slow to get signal .. what can i do?
LikeLike
You’re a legend. I’ve been struggling to find a way to set this up for my nephew so he didn’t have to use the command line to start X or run RetroPie. Thank you!
LikeLike
That’s wonderful to hear. I’m extremely glad that the information on the site is still relevant and of use.
Unfortunately I’ve not been adding new content for 3 years now due to critical health problems, but really wish to do so (I’ve purchased a Pi 4 in readiness).
Thank you for your extremely kind donation; it was most unexpected and helped boost the spirits yesterday and power the fight I’m up against.
Wishing you all the very best,
RetroResolution
LikeLike
Thanks for the guide it still works great.
However something to note:
If you copy the text in a windows editor and push it to the pi via something like win scp you have to change the file to unix line endings like desribed here:
https://stackoverflow.com/questions/6473766/syntax-error-near-unexpected-token-in-r
LikeLike