Switch Between Application Suites on your Multipurpose Pi with Ease
In this article, which builds upon the preceding post Multipurpose Raspberry Pi: Installing a Media, Gaming, PC Replacement, I demonstrate the addition of a menu to allow easy switching between application suites.


Whilst the solution overall is relatively straightforward, I’ve gone into some depth in order that this post can serve as a general how-to guide, providing some insights into Bash shell scripts, including: installing scripts using the desktop GUI or command line tools; how the code file is made executable; automatically running a script after login, and after programs are exited by the user; and other related concepts.
Topics Covered in this Post
- Menu Design Requirements and Goals
-
Introducing the Menu Script
– a Bash script handling user input and launching of the appropriate application suite
– re-displaying the menu upon exit from the selected suite -
Installing the Menu Script
– either using the Raspbian desktop, or
– via a remote SSH session -
Marking the Script File as Executable
– either using the File Manger GUI, or the command line -
Adding Code to Launch the Menu
– updating the .bashrc script to automatically run the menu when the Raspberry Pi first logs in
– preventing the menu from loading when Bash terminal windows are opened in the desktop, or when a remote SSH session is launched -
Optional Command Line Alias
– adding a Bash command alias to allow simple manual launching of the menu script -
Optionally Booting with Numlock On
– start the Bash terminal with Numlock enabled to aid menu option selection
Menu Design Requirements and Goals
As noted in the post detailing the installation of the Multipurpose Pi system, the RetroPie emulator system cannot be launched from the X-Windows Raspbian desktop GUI. This restriction forced the requirement that the Pi boot to the text-mode Bash terminal, which in turn required launching of a chosen application suite via typed commands:
startx for the Raspbian desktop,
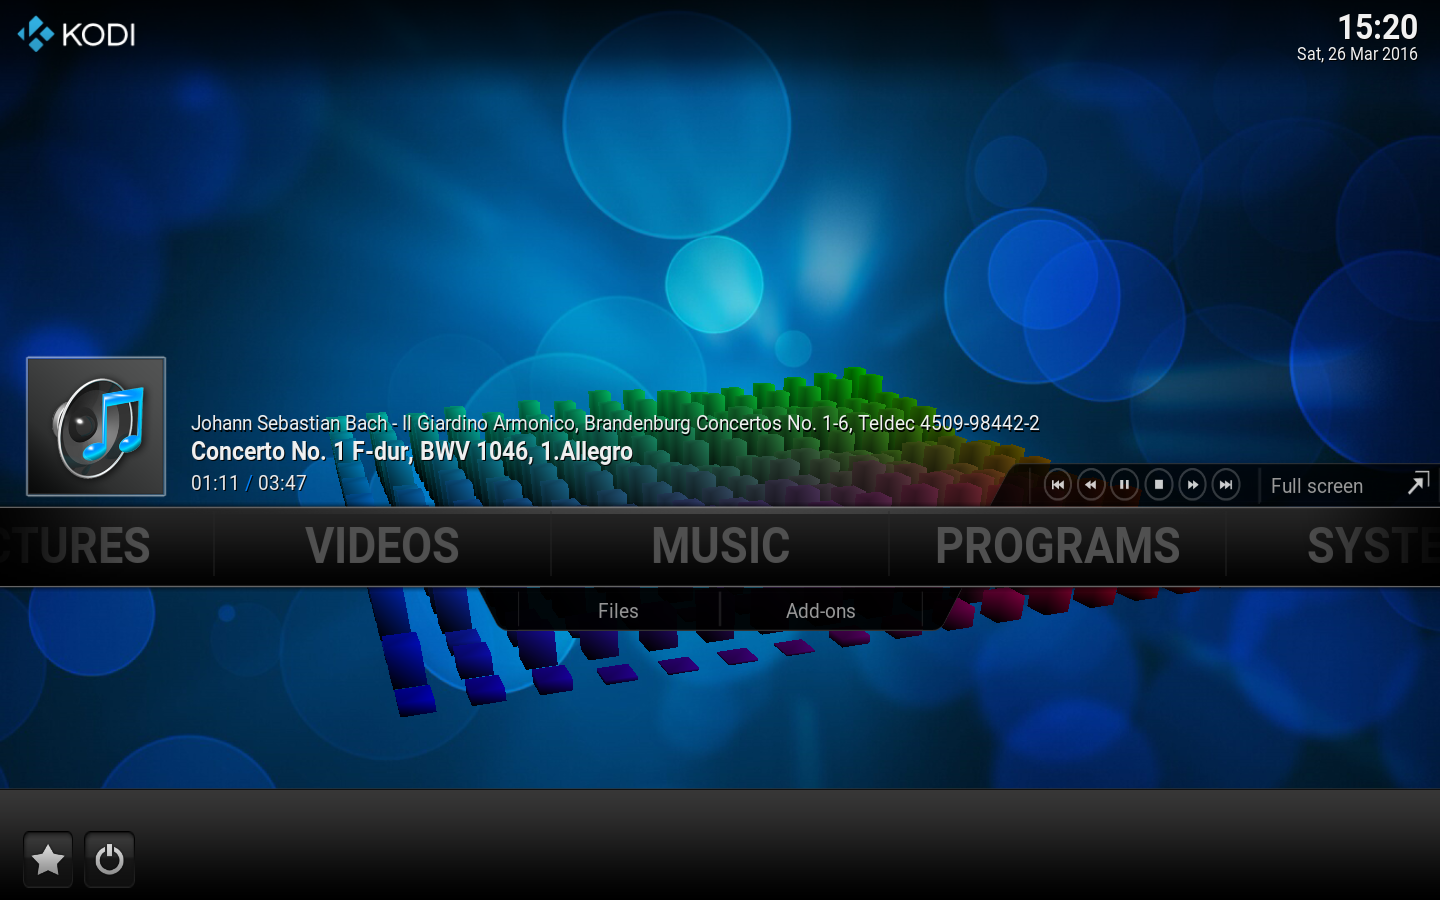
kodi for the Kodi Media Center, and
emulationstation for RetroPie.
Whilst this wasn’t a major issue, I wanted a method to launch a given suite without having to type commands at the Bash terminal – ideally via a menu-driven selection system. Whilst this necessarily must be text-based, it is friendlier than facing a blank command prompt upon booting.
Furthermore, I wanted the menu to automatically run when the Pi boots to the terminal, and also to be re-displayed whenever the user closes one of the selected application suites (using Kodi‘s power button, Emulation Station‘s Quit submenu, or Raspbian desktop’s main menu Shutdown option):


Most solutions which automatically run a script after the Pi is logged in, whether manually or automatically, will run the code each and every time a Bash shell is launched, whether this is as a terminal emulator under the Raspbian desktop, or a remote SSH session. This was not desirable, given that I make heavy use of secure shell remote connections, and use the command line often, even when using the desktop; thus I wanted to limit the menu to launching under a very narrow set of circumstances.
To achieve these design aims, several components are combined to provide the end result, however the overall solution is reasonably straightforward.
Introducing the Menu Script
The complete menu script is located on the page entitled Multipurpose Menu Selector Script: Source Code on this site.
A slightly modified version of the script, allowing a default option to be launched after a configurable timeout period has elapsed, can be found on the page entitled Multipurpose Menu Selector Script: Source Code V2 Including Timeout Default on this site.
Both versions are presented on separate pages to aid cutting and pasting into a local file whilst following this guide.
The code for both versions is modified from an original example by user Alex Lucard on askubuntu.com
In the script a Case statement handles the user input, and either launches an application – Raspbian desktop, Kodi, or RetroPie – or Reboots or performs a Shutdown of the Raspberry Pi.

If an application is launched, the code in the Case statement also recursively runs the menu script. This is done so that the menu is present if the user exits the application (as opposed to rebooting or shutting down the machine). Note that the full path and script name /home/pi/tools/selector.sh are used, and should be updated if you rename and / or relocate the code.
The reason that this works is that the Bash terminal that is launched as the Pi completes the boot process remains running even after one of the main applications is launched; the selected application, such as RetroPie, is launched as a separate process on a different thread, independently of the terminal.
Installing the Menu Script
The menu is mainly implemented as a Bash script, which is installed by copying and pasting the code into a new file on the Raspberry Pi. There are a couple of ways to achieve this, using either GUI tools from the Raspbian desktop, or text-mode utilities via a remote connection from another machine.
Option 1 – Using the Raspbian desktop and a GUI text editor:
-
Create a new text document using a tool such as Leafpad or gedit.
– Leafpad is installed as standard and can be accessed via the Raspbian desktop Menu, selecting Accessories, then Text Editor.
– gedit is a more sophisticated, but easy to use, text editor useful for simple programming and script editing, and supports syntax colourisation. To install gedit, run the following command from a terminal:
sudo apt-get install gedit -
Copy the complete menu script from the page entitled Multipurpose Menu Selector Script: Source Code
– click the link to open the page in a separate browser tab, than copy the code, and paste it into the text editor -
Save the file into the
home/pi/toolsdirectory, naming it asselector.sh
– if thetoolsdirectory does not exist, create it from the terminal using the command:mkdir /home/pi/tools, or from within the GUI File Manager
Note: please ensure that the file does not have a.txtextension appended to it by the text editor during the save process
Option 2 – Using a Remote SSH Session and Command Line Tools:
- Connect to the Raspberry Pi from another machine (Windows, Linux, Android, Mac, etc.) using a remote shell client programme, such as PuTTY
-
Open a new file using the in-built Nano text editor (or your editor of choice). When launching Nano use the
sudoprefix command to ensure the new file can be written back to the file system:
sudo nano selector.sh - Select and copy all of the script code from the page entitled Multipurpose Menu Selector Script: Source Code
- Paste the code into the newly created file on the Pi (if using PuTTY, a right-click of the mouse will copy the contents of the Windows clipboard into the shell).
- Save the file. If using Nano, press
Control + 'X', then'Y'
Mark the Script File as Executable
Whichever approach is used to create the script, it must be marked as an executable file so that the code within can be run by the operating system. This can be done via the GUI File Manager, or at the command line:
-
To Mark the File as Executable Using the GUI:
– select File Manager from the Accessories menu within the main desktop Menu
– locateselector.sh, right click the file, select Properties, then the Permissions tab, and finally set Execute to Anyone
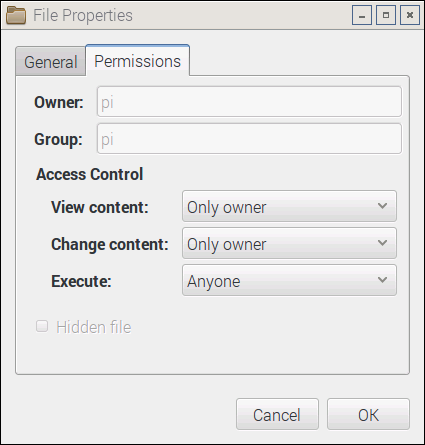
Raspbian File Manager – Properties Menu – Permissions Tab -
To Mark the File as Executable Using the Command Line:
– open a Bash console using the desktop Menu, selecting Accessories, then Terminal
– run the following command:
sudo chmod +x /home/pi/tools/selector.sh

Adding Code to Launch the Menu
The code which runs the script to display the menu is placed in the .bashrc file, which is located in the home directory of the user Pi.
As this system file already exists, it is not possible to simply open a GUI text editor from the Raspbian desktop menu, add the necessary code, and save the file. This is due to the fact that the operating system launches programs, including text editors, with the permissions of the currently logged-in user; the Pi user account does not have permission to save changes to this system file.
One option is to use a Bash terminal window to launch a text editor with super-user privileges:
sudo leafpad /home/pi/.bashrc
Another option is to use the text-mode nano editor:
sudo nano /home/pi/.bashrc
Whichever option you select, edit the /home/pi/.bashrc script, adding the following code to the end of the file:
##########################
## auto launch the Menu ##
##########################

# launch Menu only when main (non gui) terminal loads (once per boot)
# do not run Menu when shell is launched within GUI, or from SSH
#   TERM value = 'linux' when at main non-gui terminal
#   and 'xterm' for a shell launched from the GUI

if [ -n "$SSH_CLIENT" ] || [ -n "$SSH_TTY" ]; then
   #echo Session is remote / ssh.
   # : is a no-op
   :
else
   if [ "$TERM" = "linux" ]; then
           /home/pi/tools/selector.sh    #run the menu script
   fi
fi
Please note the absolute path and file name in the line:
/home/pi/tools/selector.sh #run the menu script
This must reflect the actual location and name used for the menu script file, if these have been altered from those used in the preceding guide.
A couple of further notes on the above code may be of interest for those unfamiliar with bash shell scripting in particular, or programming in general. In order to meet the design goals of only running the menu script when the Raspberry Pi is first booted and the login process completes, but not when a Bash terminal is launched within the Raspbian desktop, or remotely via an SSH session, a couple of system variables are interrogated.
The .bashrc script is automatically launched by the operating system whenever a bash terminal is launched. The $TERM variable holds the value x-term if terminal has been launched under X-Windows desktop, and the value linux if at the main text-mode console. The code only runs the selector.sh menu script if $TERM indicates that the desktop is not running.
When a remote connection is made to the Raspberry Pi, $TERM still returns the value linux, as SSH connections are non GUI text-mode sessions. For this reason a additional check is made to see if either of the system variables $SSH_CLIENT or $SSH_TTY exist (the actual values aren't of consequence). If one or both is present, the Bash terminal is being created by a remote session, in which case we prevent the menu script from being executed.
Optional Bash Command Alias to Launch the Menu
To aid manual launching of the menu from a terminal, a command alias can be created which saves typing the full path and name of the menu script.
Edit the existing .bash_aliases file:
sudo nano ~/.bash_aliases
Add the following to end of the file, and save the changes:
alias menu='bash ~/tools/selector.sh'
Please note: the ~ (tilde) symbol represents the home directory of the logged in user, and is the equivalent of /home/pi
The menu can now be run from the command line, regardless of the current directory, by typing:
menu
This is more convenient than the alternative:
/home/pi/tools/selector.sh
Optionally Boot with Numlock On
To aid use of the menu, add a line of code to the keyboard configuration file to enable Numlock in the terminal when the Pi first boots.
Open the config file:
sudo nano /etc/kbd/config
Locate and uncomment the following entry by removing the # from the start of the line (or create the line if it is not present), then save the changes:
LEDS=+num
Please note that the Raspbian desktop will still default to switching Numlock off; whilst there is a utility available, numlockx, to address this, it causes (harmless) errors to be displayed in the console.
A Labour of Love
Retro Resolution is entirely a labour of love. Please consider offering a donation if the information here has helped illuminate, enlighten, or otherwise assisted you!

Related Posts
- Links: Raspberry Pi and Gaming Emulation via RetroPie
- Multipurpose Raspberry Pi: Installing a Media, Gaming, PC Replacement
- Don’t Fear The Command Line: Raspbian Linux Shell Commands and Tools – Part 1: Just the Basics
- Navigating the Raspberry Pi’s File System. Raspbian Linux Shell Commands and Tools – Part 2
About
Disclaimers
Privacy Policy
Terms and Conditions
© Retro Resolution

Nice post! Thanks for putting this all together! I have it set up and working on my Pi 3. Only thing I didn’t use is the Optional Bash Command Alias to Launch the Menu, mainly because I couldn’t find the existing .bash_aliases file on my instillation. Or the number lock one. Anyway! I am enjoying some old Atari gaming!
LikeLike
Hi, very glad the post helped you.
The .bash_aliases file may not yet exist; often on Linux systems configuration files don’t exist by default.
The ‘.’ prefix indicates a hidden file, which can be seen with the command:
ls -a
If the file is not already present, you can create it, for instance using nano:
sudo nano .bash_aliases
LikeLike
I have only had a Pi since march and I am a little new to Linux (using Xubuntu) but knew that the ‘.’ meant it was a hidden file. So I just used the “show hidden files” in the file and folder view (gui side on raspbian) and was able to show the other .bash files and it’s not there under the /home/pi directory. I was going to create it but noticed the menu worked fine without it.
LikeLike
The .bash_aliases entry is just to make life a little easier should you wish to launch the menu from the command line – generally you won’t want to, so everything will work as intended.
I mentioned the hidden files partly on the off-chance that this was the issue, and partly in the hope it would help somebody in the future if they read these comments.
Happy to see it’s working for you!
LikeLike
I forgot to mention that I have the Pi set to boot and auto log into cli. The menu is already there after boot. Works for me. I really like this better then using a multi-boot system like berryboot. Anyway! Keep up the good work! I am learning from it!
LikeLike
You have your Pi set the way I have mine, booting with auto-login to the command line, with the menu auto-launching via the scripts – good to hear it’s working.
I also tried BerryBoot, and found having multiple complete Raspbian installations underpinning each application (desktop, Kofi, RetroPie) was overkill.
Thanks for the positive feedback, it really is encouraging.
LikeLike
Very awesome. Before I (slowly) reinvent the wheel, has anyone done a variation of (or an alternative to) selector.sh which defaults to a particular menu option after a nominated timeout? (eg default to Kodi, or default EmulationStation if no choice within 60 secs?
LikeLike
Hi,
Thanks for your comment – apologies for the delayed response.
I’ve added a response which lists a modified version of the selector.sh menu script to another similar request on the post:
Multipurpose Raspberry Pi: Installing a Media, Gaming, PC Replacement
Search for the comment containing the text:
“Here’s a revised version of the menu selector.sh script, which provides a workable, if somewhat rough and ready, solution which includes a timeout which will launch an arbitrary command (in this case loading the desktop via ‘startx’ after 60 seconds).”
LikeLike
Awesome! Thanks so much for this 🙂
LikeLike
Thank you so much for the easy to follow tutorial. I just set up my RPI 3 using it. One issue I’m having is after I boot up, if I select Kodi in the menu it works fine, but when I exit kodi the screen goes blank and the menu fails to appear, however it still times out and starts startx as it is supposed to. Any tips? Thank you.
LikeLike
Thank you for the positive feedback, it’s much appreciated.
I’ll take a look at my installation and see how Kodi behaves when it’s launched from the menu, then exited.
I actually never use that option, preferring to load the desktop and run Kodi from there – this allows Raspbian’s USB drive automounting to work optimally. I have another Pi setup with automounting via config files, but thus prevents Kodi’s file manager being able to dismount a drive.
LikeLike
Hi,
I’ve just been testing the menu on my installation; I can launch Kodi directly from the menu, and have it exit cleanly back to the menu (and have it autolaunch the desktop after 20 seconds).
I have Kodi 16.1 installed, along with the May 2016 Raspbian release (last version prior to the Pixel theme update in September).
Earlier Kodi releases have problems when exiting, even if launched from Raspbian desktop, whereby they leave you on a black screen (maybe just a flashing cursor will show).
The workaround was to use Ctrl+f2 then Ctrl+f1, which forces Linux to display the second virtual console, then redisplay the main console – generally this would prompt the display to update correctly.
Hope this helps you resolve the issue on your system.
LikeLike
Hi there!
I carried out the multipurpose raspbian, retropi and kodi install and added a menu several months ago after buying my first raspberry pi, and it worked really well for me and has been great to use so thank you very much.
The only issue I’m having now is since the Kodi 17.1 update. Kodi will no longer work for me and I’m not sure how to update it to the most recent build, as I’m scared I’ll mess up the multipurpose install etc! Do you have any advice on how I can install the latest version of Kodi for Raspberry Pi within the framework of the installation from your previous guides?
Thanks again for your help!
LikeLike
Hi,
Thanks for your feedback.
I still have Kodi 16 on each of my Pi installations. Could you let me know the method you used to update your Kodi, and what happens when you try to launch it now?
LikeLike
Hi again. Thanks for the reply and sorry for the delay! I stumbled my way through the update procedure within Kodi, which I could easily have got wrong. After doing so, rebooting the Pi and accessing Kodi, I was then unable to play any streams. I kept being told no streams were available as if Kodi was empty if you get my meaning. I shut down and went to message you!
LikeLike
Really appreciates your great instructions and have since sent this to several other people.
The only thing I thought it was missing was an update option which I use regularly. I went into the selector.sh file and added an option 6) Update and Upgrade where I call
$ sudo apt-get update && sudo apt-get upgrade && sudo apt autoremove
LikeLike
Hi there, I really enjoyed this tutorial. However I am having a tough time getting back to my desktop from the menu that was made. Any time that I put the command for the desktop in it looks like it is about to boot and then puts me on a black screen that never turns into anything. I also am unable to scrape my game images because when I do the RetroPie throws me back to the menu and leaves me unable to type anything. Are there any tips you have for alleviating the problem I am having? Thank you
LikeLike
So the desktop command starting showing me an error prompt before going into the black screen of death.
It says
(EE)
Fatal Server Error:
(EE) Could not write old to lock file in /tmp/ .tx0-lock
(EE)
(EE)
Please consult the The X.Org Foundation support
at http://wiki.x.org
for help.
(EE)
LikeLike