Overclocking the Raspberry Pi 3: Thermal Limits and Optimising for Single vs Multicore Performance

Pragmatic Overclocking

Silicon Wafer - Image: GamersNexus.Net
Silicon Wafer – Image: GamersNexus.Net

Overclocking the Raspberry Pi 3 – Free Speed and Trade-offs

The Raspberry Pi 3, in common with the the older Pi 1 and Pi 2 models, can be overclocked – that is, the main processor, graphics chip, and memory, can be run faster than the default factory settings. Whilst more speed equals more processing power, there’s a trade-off to be considered with the new hardware that generally wasn’t an issue on the earlier systems.

Please Note: at time of writing overclocking the Pi 3 does not appear to be officially sanctioned. This is noted in a post on Gordons Projects, and can be seen in the overclocking entry in the Raspbian O/S’s raspi-config tool, which states ‘This Pi cannot be overclocked’. I do not know whether implementing any overclock options on the Pi 3 will set any internal flags and affect your warranty (early generation Pi’s do so if the Governor is bypassed). If in doubt, wait until the Raspberry Pi foundation makes a statement on the subject.

Raspi-Config Pi 3 - This Pi Cannot be Overclocked
Raspi-Config Pi 3 – This Pi Cannot be Overclocked

Nevertheless, the new Pi can certainly be overclocked. Whilst the process by which this is achieved remains the fundamentally the same, editing the config.txt file, overclocking is not quite as straightforward as it previously has been. The issue is one of thermodynamics, as the new model runs somewhat hotter than the those of the previous generations, at least in the case of the Pi which I took delivery of the day after the new model was released*

* The presence of high CPU temperatures on the new machine could be limited to a certain batch, or an example of the variations in CPU tolerances such as those resulting from lithographic techniques used to create the processors.
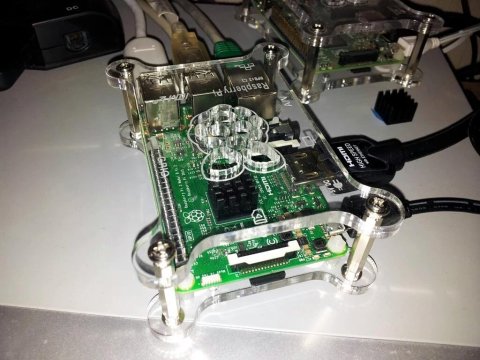
Raspberry Pi 3 within Camac Case, with PiHut Heatsink

Continue reading

Overclocking and Stability Testing the Raspberry Pi 2 – Part 3: RAM Checking With Memtester

Stability Testing an Overclocked Raspberry Pi
 

Checking RAM Reliability with Memtester after Overclocking

In the third part of the series of posts concerning Overclocking and Stability Testing the Raspberry Pi, we will use Memtester to test the Pi’s RAM.

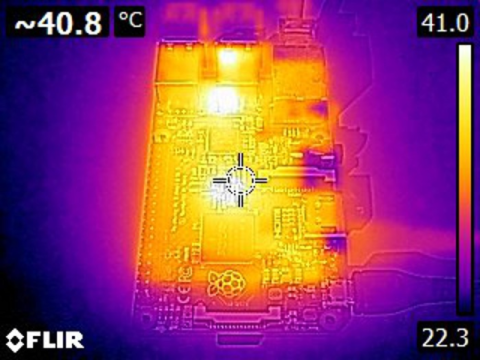
Raspberry Pi 2 FLIR - Image: rs-online.com
Raspberry Pi 2 FLIR – Image: rs-online.com

What is Memtester?

Memtester is a memory testing tool which:

  • Tests the stability of the RAM
  • Natively runs on a single CPU core, but can be run on all cores using multiple remote SSH sessions, or the Screen tool

The Memtester Man page at Linux.die.net states:

memtester is an effective userspace tester for stress-testing the memory subsystem. It is very effective at finding intermittent and non-deterministic faults

Assistance for those new to Linux

Making changes to the Overclock settings on the Pi, and testing the changes for stability, requires a little knowledge of the Linux command shell. Please see my related post for a basic guide which should help those new to Linux and/or Raspbian get started: Don’t Fear The Command Line: Raspbian Linux Shell Commands and Tools – Part 1

Installing Memtester

The Memtester software package can be installed easily using the command line / shell via the Raspbian OS’s APT Package Management Tool.

The APT maintains a repository of available packages, and their dependencies (other packages which a given package requires). Before installing a new package it is good practice to first update the repository list to ensure that you obtain the latest version of whichever package you wish to install, and to avoid dependency issues.

To update the APT repository, at the command shell, type:

sudo apt-get update

To install the Memtester package, type:

sudo apt-get install memtester

Running the Memtester Script on a Single CPU Core

TO Run Memtester on a single core, at the command line specify the memtester program, along with two parameters:

  • 1. The amount of memory to test, followed by a lowercase ‘m’ – do not leave a space between the two. The program will attempt to lock the required amount of RAM, but will use the nearest available amount if this is not possible.
  • 2. The number of iterations to run the test over.

Continue reading

Overclocking and Stability Testing the Raspberry Pi 2 – Part 2: Stability Testing

Stability Testing an Overclocked Raspberry Pi
 

Checking that the system is reliable after applying overclocking

Overclocking is nothing without Stability. Image - www.wallpaper.ge/
Overclocking is nothing without Stability. Image – http://www.wallpaper.ge/

Following on from Part 1 of this post on Overclocking, we turn our attention to stability testing the system; this process is crucial, as simply witnessing the Pi boot to the command shell, or a Graphical User Interface (GUI) isn’t proof that a given combination of overclock settings is stable.

Sometimes an instability will only become apparent after several hours of intensive activity on the system (which is highly likely if using the system for gaming with an installation such as RetroPie).

There are three tools / scripts which I have used in the stability testing processes. For each I will provide instructions on obtaining and installing (or running, as appropriate):

  • MPrime.py
    – Python script to search for prime numbers, which heavily loads the CPU
    – User selectable numeric range to test
    – User selectable number of cores to run upon simultaneously.
  • Memtester
    – Tests the stability of the RAM
    – Natively runs on a single CPU core, but can be run on all cores using multiple remote SSH sessions, or the Screen tool
  • Stability Test Script
    – Reads the entire SD card 10x. Tests RAM and I/O
    – Writes 512 MB test file, 10x.
    – Script can be easily updated to change the number of reads/writes etc.

This post covers the use of mprime. Subsequent posts covers the use of Memtester and the Stability Test Script. Please use the links in the above list to access the relevant information.

Continue reading