Recording Live Gameplay in RetroPie’s RetroArch Emulators Natively on the Raspberry Pi

Capturing Footage in Real-Time Without Additional Hardware from RetroPie’s Libretro Core Emulators

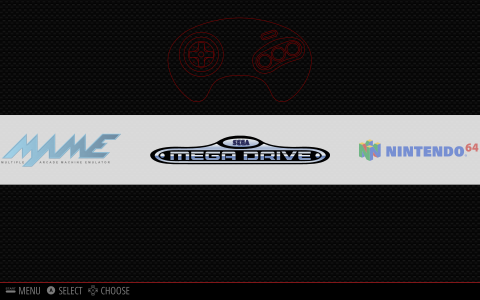
Video Captured Natively in RetroPie - Source: RetroResolution

The following guide demonstrates how to enable the capture of real-time gameplay footage from various console systems available in the RetroPie emulator suite, a number of which can utilise the RetroArch framework to provide an integrated audio-video recording facility.

Implemented natively on a standard Raspberry Pi, this approach runs without the need for any external hardware (such as an Elgato capture-card).

Topics

A Little Background Information

My motivation to undertake what has become a sizeable research, development, and experimentation, project grew from a simple desire to obtain recordings of emulators running under RetroPie. I’d previously managed to enable the audio-video feature provided by the Atari ST emulator, Hatari, and was hopeful that a software-only solution was feasible for other systems.

RetroPie Versions Tested

At time of writing this guide has been tested on RetroPie 3.7, 3.8.1, and 4 (rc-1) setups, all running on installations of Raspbian Jessie 2016-05-27, and RetroPie 4.0.3 installed on Raspbian Jessie with Pixel 2016-09-23

Searching for other emulators offering recording, I found only the non-Libretro variant of Fuse to have in-built facilities; whilst serviceable for capturing ZX Spectrum games, the audio-video files generated by the emulator are of a decidedly non-standard format.

Fundamentally it was my experiments when attempting to transcode footage of Technician Ted captured from Fuse, first with avconv, and later with FFmpeg, and a subsequent enquiry on the RetroPie forum, which spawned the series of articles which form this how-to guide.

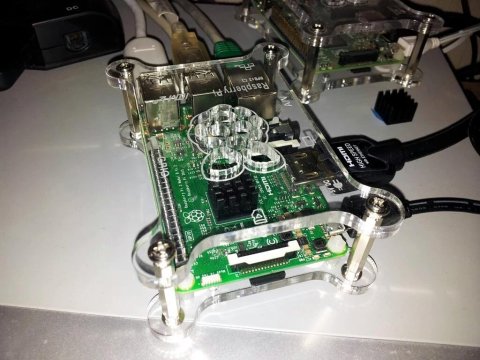
For reference, the system used whilst researching this project was a Raspberry Pi 3, overclocked to 1300mhz (please see Overclocking the Raspberry Pi 3: Thermal Limits and Optimising for Single vs Multicore Performance for specifics).
Continue reading

Automatically Mounting an External USB Hard Disk on the Raspberry Pi

How-to Guide: Automatically Mount an External USB Storage Device at Boot Time, and Within Emulation Station

Raspbian Logo
External Hard Disk - Image: Clipshrine.com
USB Symbol - Image: Clipshrine.com

This how-to guide shows a method to automatically mount an external USB drive on the Raspberry Pi. The general technique which I have adopted and is common, and whilst there are similar guides available, I have adapted the approach specifically for use on a Pi running Raspbian Lxde Desktop, Kodi Media Center, and Emulation Station with RetroPie.

In this article I aim both to demonstrate and expand upon the steps involved, whilst highlighting some issues which I have encountered when using this approach, and providing their resolutions.

Topics

A Little Background Information

My Raspberry Pi 3 is setup to serve triple duty as a lightweight PC replacement, running the Raspbian desktop, as a media center using Kodi, and as a retro video game emulator suite, via RetroPie. I have my machine set to boot to a custom menu at the command prompt, rather than directly to the desktop, to facilitate easy switching between these options. Please see the Related Posts section for setup guides detailing how this was achieved.

The Raspbian kernel does not automatically mount external USB drives by default; this isn’t an issue when launching the Kodi media center, or the desktop, as both have the capability to detect and mount a USB hard disk or flash storage device once it is connected.

Continue reading

RetroPie Manual Installation Guide, including the Version 4 Setup Script Revised Menu Structure

How-to Guide: Manually Installing RetroPie: Navigating the RetroPie Setup Script Menu Structure

Emulation Station - Emulator Selection - RetroPie 3
Emulation Station – Emulator Selection – RetroPie 3

Following the June 8th 2016 update to the RetroPie Setup Script the functionality and menu structure have changed noticeably from the streamlined earlier incarnation.

Whilst the new (at time of writing) version 4.0 DEV allows far more control over the setup and maintenance of RetroPie, it necessarily appears a little more complex than before; in this guide I illustrate the revised layout.

Sections of this article expand upon my previous guide: Multipurpose Raspberry Pi: Installing a Media, Gaming, PC Replacement

Topics Covered

Manually Installing RetroPie

Installation of RetroPie on an already extant Raspbian system is relatively straightforward. For guidance on installing and setting up Raspbian, please see Multipurpose Raspberry Pi: Installing a Media, Gaming, PC Replacement

First, after completing the steps listed, ensure that the Raspberry Pi has been rebooted.

Continue reading

Power Without the Price: Atari ST and STe Computing on the Raspberry Pi with RetroPie’s Hatari Emulator

The extremely inexpensive Raspberry Pi allows faithful emulation of Atari ST and STe machines, splendidly affirming Atari’s mid-1980’s slogan Power Without the Price; in this guide I cover the configuration and utilisation of RetroPie‘s Hatari emulator.

Atari Logo - Atari ST Text - Machine

I have a great fondness for Atari‘s computers, having owned a 130XE before moving on to the 16-bit ST range; it was many years later that I discovered that the latter machines were largely the product of Commodore engineers, the true technological successor to the Atari 8-bit range being, through quirks of business and fate, the Amiga.

My stalwart 520STfm machine dutifully provided years of service in a broad array of roles, including: code development, primarily using Action! and GFA Basic; word-processing in 1st Word Plus; running inspiring demoscene productions; driving MIDI keyboards; and of course the inevitable core function as a gaming platform.

This guide has been written primarily for the Raspberry Pi implementation of Hatari, which for RetroPie 3.6 is the latest version, 1.9.0, released in September 2015. As the emulator has been compiled from the original source code virtually all of the following information will be equally applicable to the Windows, OSX, and other Linux platforms besides Raspbian.

Topics Covered

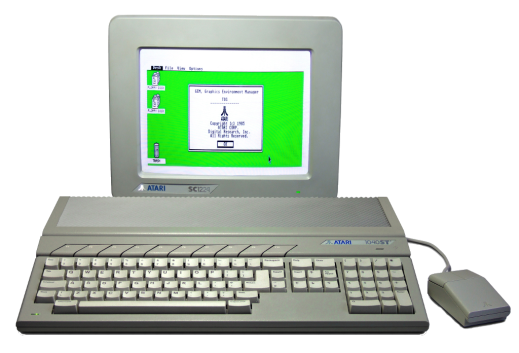
Atari ST with Monitor
Atari ST with Monitor – Modified from Original Image: Wikipeida

Emulation Without a Safety Net

RetroPie‘s emulators for classic computer systems do not implement the common functionality found in the RetroArch Core systems. For further details, please see the What is RetroArch? section in the post RetroPie system overview – software and hardware components, and the related article: RetroPie Emulation: RetroArch, Libretro, and the Power of the Options Menu

Hatari implements a native options menu which is accessed via a preset function key, F12, and navigated only via mouse (thus requiring both a USB or Bluetooth keyboard, and a mouse).

Continue reading

Multipurpose Raspberry Pi – Part 2: Adding a Menu to Access RetroPie, Kodi, and the Raspbian Desktop

Switch Between Application Suites on your Multipurpose Pi with Ease

In this article, which builds upon the preceding post Multipurpose Raspberry Pi: Installing a Media, Gaming, PC Replacement, I demonstrate the addition of a menu to allow easy switching between application suites.

multipurpose_selector_menu_extreme_crop

diverging down arrows_alpha

Raspbian Desktop GUI
Raspbian Desktop
Emulation Station - Emulator Selection - RetroPie 3
RetroPie / Emulation Station
Kodi Media Center - Music Playback
Kodi Media Center

Whilst the solution overall is relatively straightforward, I’ve gone into some depth in order that this post can serve as a general how-to guide, providing some insights into Bash shell scripts, including: installing scripts using the desktop GUI or command line tools; how the code file is made executable; automatically running a script after login, and after programs are exited by the user; and other related concepts.

Topics Covered in this Post

Menu Design Requirements and Goals

As noted in the post detailing the installation of the Multipurpose Pi system, the RetroPie emulator system cannot be launched from the X-Windows Raspbian desktop GUI. This restriction forced the requirement that the Pi boot to the text-mode Bash terminal, which in turn required launching of a chosen application suite via typed commands:

startx for the Raspbian desktop,
kodi for the Kodi Media Center, and
emulationstation for RetroPie.

Whilst this wasn’t a major issue, I wanted a method to launch a given suite without having to type commands at the Bash terminal – ideally via a menu-driven selection system. Whilst this necessarily must be text-based, it is friendlier than facing a blank command prompt upon booting.

Furthermore, I wanted the menu to automatically run when the Pi boots to the terminal, and also to be re-displayed whenever the user closes one of the selected application suites (using Kodi‘s power button, Emulation Station‘s Quit submenu, or Raspbian desktop’s main menu Shutdown option):

Kodi Media Center - Power Menu - Exit to Command Line
Emulation Station (RetroPie) - Quit Menu - Exit to Command Line
Raspbian Desktop - Shutdown Menu - Exit to Command Line

converging down arrows_alpha

multipurpose_selector_menu_extreme_crop

Continue reading

Multipurpose Raspberry Pi: Installing a Media, Gaming, PC Replacement

Have Your Pi and Eat It!
 

Raspbian Logo
Kodi Media Center Logo
retropie_logo_300x300

In this post I’ll be documenting how I set up a Raspberry Pi 3 (you can also use a Pi 2) as a lightweight PC replacement, combining a fully-fledged desktop GUI (Raspbian), Media Center (Kodi), and video games console and computer emulation suite (RetroPie).

The Pi 3 actually makes for a very capable PC replacement; this, and recent, posts, including graphics work, have been undertaken solely on the machine.

Topics Covered in this Post

A Little Background

I have a couple of older Raspberry Pi machines, each of which is limited to a single task. The Model 1 Pi has been doing duty for a couple of years as a media center, and is dedicated to running XBMC (named for XBox Media Center, showing the roots of the project which is now known as Kodi).

The Pi 2 is currently used for retro video gaming, running an installation of RetroPie 2; I ill-advisedly used the retropie_setup.sh script option to delete Raspbian files that were not directly needed by RetroPie, thereby removing the option of using the machine as a desktop replacement.

Having taken delivery of a shiny new Raspberry Pi 3 I was keen to take advantage of the increased power of the machine, along with a sizable 64GB SD Card, using it to perform multiple duties: a media center, a retro-gaming system, and PC workstation. I also wanted to avoid the need for swapping SD Cards, which is both a hassle and introduces needless wear and tear on the card port.

Raspberry Pi 3 within Camac Case, with PiHut Heatsink

Continue reading

PlayStation Emulation on the Pi: Enhancing the Experience with the Options Menu – Part Two: Graphics

Accessing the RetroPie PlayStation Emulator’s High Resolution Mode

PlayStation. Ridge Racer Type 4. Bridge. Standard Resolution, Bilinear Smoothing
PlayStation. Ridge Racer Type 4. Bridge. Enhanced Resolution, Bilinear Smoothing

This post builds upon the information in the preceding article PlayStation Emulation on the Pi: Enhancing the Experience with the Options Menu – Part One: Basic Features and Save States , and the introductory piece entitled RetroPie Emulation: RetroArch, Libretro, and the Power of the Options Menu.

Many of the entries on the RetroArch/Libretro main menu screen lead to sub menus, most of which contain numerous entries, and further sub menus. Discussed here are a couple of entries within the Core Options sub menu of especial interest to PlayStation emulation.

Core Options – Enhancing the Graphics Resolution

It is possible to force RetroPie’s PCSX-ReARMed PlayStation emulator to render graphics in a resolution considerably higher than the native modes available on the genuine console’s hardware. I should note that whilst this can make stunning visual improvements to many games on the system, unfortunately the Raspberry Pi 2 lacks enough CPU power to reliably run all games at full speed.

PlayStation. Ridge Racer Type 4. Out of Blue. Standard Resolution, Bilinear Smoothing
PlayStation. Ridge Racer Type 4. Out of Blue. Enhanced Resolution, Bilinear Smoothing

Rendering the output in enhanced resolution incurs significant processing overhead. The emulator in its current form is only able to utilise one of the four CPU cores present on the Pi; perhaps a future (radical) enhancement to PCSX-ReARMed will unlock the full potential of the system.

All is not lost, however, and gaining additional processing power by running the Pi with maximum stable overclocking is definitely recommend – see my earlier posts on this topic for information on enabling and testing overclocking: Overclocking and Stability Testing the Raspberry Pi 2 – Part 1: Overclocking in Depth

Continue reading

PlayStation Emulation on the Pi: Enhancing the Experience with the Options Menu – Part One: Basic Features and Save States

The Libretro Options Menu – the Key to Enhanced PlayStation Emulation

PlayStation. Rage Racer, In Game. Standard Resolution - Smoothed
Libretro Menu - Core Options submenu
PlayStation. Rage Racer, In Game. Enhanced Resolution - Smoothed


This post builds upon the information in the preceeding article entitled RetroPie Emulation: RetroArch, Libretro, and the Power of the Options Menu.

Edit: This post has been extended to account for differences in RetroPie 3.6’s version of RetroArch/Libretro. The PlayStation emulator remains the same in both the 2.x and 3.x RetroPie revisions (Pcsx-ReARMed r22). The original post was based on RetroPie 2.x

Topics Covered In Part 1

PlayStation Emulation on PiPlay and RetroPie

As noted in the aforementioned post, before discovering RetroPie I’d been running PiPlay on the Raspberry Pi 2, which provides a broadly similar emulation platform to RetroPie. Whilst the graphical emulator selection front-end is different to Emulation Station, many of the same emulators are in place; however all is not as simple as it appears.

Unfortunately, with the build of PiPlay I was using I ran into problems with various emulators; virtually all Megadrive / Genesis games I tried had corrupted sound, many would freeze at random, and there was no support at all for the 32X. The PlayStation emulator initially appeared to be excellent, however as I tried more titles I uncovered a number of shortcomings; I’m planning a future post on this topic, as the same emulator in RetroPie has a few different issues, and I became obsessed with understanding the problems in a bid to have the best of both worlds.

PiPlay Emulator Selection Menu
PiPlay Emulator – Main Menu
Emulation Station - Main Menu - PlayStation Focused
Emulation Station – Main Menu

I should note that, being impatient to see if the Raspberry Pi was a solid emulation platform, I quickly switched to RetroPie and have not subsequently installed any newer PiPlay images; nonetheless the PiPlay distribution has many sound ideas, and is definitely worth further investigation.

One core feature which the PiPlay incarnation of the PlayStation emulator has is a comprehensive in-built options menu, accessed via the Escape key. This allows access to various settings, affecting the graphical and audio output, save states, controllers, and more. The following screen grabs show the native menu being accessed whilst a title is running:

PiPlay PCSX ReARMed Native Menu - Advanced
PiPlay PCSX ReARMed Native Menu – Advanced
PiPlay PCSX ReARMed Native Menu - Controls
PiPlay PCSX ReARMed Native Menu – Controls

Coming to the RetroPie version of the same emulator, I was surprised to find that this menu no longer existed; at the time I had no knowledge of the unified environment shared by Libretro-enabled emulators, but found various references to the ‘core menu’ in forums. As I was to discover, and as detailed in the preceding post, RetroPie’s PlayStation emulator implements the standard Libretro menu system.

Note: the terms Libretro menu and RetroArch menu appear to be used as synonyms in documentation and in forum posts.

Continue reading

RetroPie Emulation: RetroArch, Libretro, and the Power of the Options Menu

What is the Libretro Options Menu, and Why Does It Matter?

consoles and home computers
RetroArch Menu - Welcome Screen
RetroArch logo

For a while after installing RetroPie, this question plagued me. I found references to the ‘Options Menu’ seemingly everywhere, but as to where it resided or how it manifested, that seemed some closely guarded secret.

Why was I looking for the elusive menu? Well, the Options Menu holds the secret to really getting the most out of many of the RetroPie emulators, from tweaking the controller settings to switching graphics rendering engines.

In my earlier post ‘What is RetroPie? System overview, software and hardware’ I provided a brief description of RetroPie, which contains numerous home computer and console emulators, up to and including the N64. As noted in that post:

RetroPie can be thought of as a framework which wraps and extends other software components, ultimately handling the loading of a selected game image into the relevant video game emulator.

image
Libretro Logo

Many of the console emulators included in RetroPie are what are known as Libretro cores; these ‘cores’ are existing emulators, modified to utilise the Libretro API, which provides a common interface and experience across multiple systems:

Again, from the aforementioned earlier post:

The system also provisions management and configuration of numerous elements, including:

  • Loading button and axis (analog) control maps, matching upon detected Usb controller(s)
  • Setting video resolution
  • Applying filtering and video overlay effects
  • Providing state management (providing loading and saving of in-progress games)

The Libretro page on the emulation-general.wikia.com site describes Libretro in the following terms:

Libretro is an lightweight C/C++ API designed for emulators… It specifies how to write a library, called Libretro core, so that it can be loaded by a frontend supporting Libretro API like RetroArch… Libretro API can be used for example to strip emulator of it’s GUI components and convert it into dynamic library called Libretro core. (sic)

On the Libretro forum, user hunterk expands on the concept of retrofitting an emulator with the Libretro API:

Libretro porting is generally a case of mapping/wrapping the emulator/game/whatever’s internal API to the corresponding libretro functions and/or callbacks. So, many ports are very shallow and require little-to-no modification of the existing core code.

Thus, the RetroArch framework brings a set of consistent features to a broad range of emulators which were written entirely independently. All ‘core’ enabled emulators feature a common menu, the elusive Options Menu, which can be accessed and navigated via keyboard or a suitably configured control pad.

Continue reading

Emulation Station – beneath the covers

What is Emulation Station, and what does it do?

Emulation Station is essentially a launcher for emulators; when RetroPie has been installed, it loads automatically when the Pi is booted, and allows user to select a game from the library, which is loaded into the required emulator.

Please note: the following assumes some familiarity with Linux, the terminal / console, and commands for basic navigation and file editing.

image
Emulation Station logo

A future post will cover core information which may be useful when getting to grips with the Pi at a lower level. Whilst the command line can be daunting if you’re only ever used to GUI systems, you really only need a smattering of commands to manipulate the files necessary for customising a RetroPie installation*

A couple of important questions to address regarding the emulators shown in the Emulation Station User Interface, before looking at the main configuration file:

Q. Why isn’t the Megadrive (Genesis/SNES/PlayStation etc) emulator showing in the list?

A. Emulation Station shows the emulators included in RetroPie in a gallery-style list which the user can scroll left or right, however a large number of the supported emulators are not shown by default. It is necessary to place at least one game ROM/image file in the emulator’s corresponding ROM folder for the emulator entry to appear in the UI.

Emulation Station - Emulator Selection
Emulation Station – Emulator Selection

Continue reading